Perler beads are a popular crafting material that allows you to create beautiful, pixelated designs. Whether you're a seasoned perler bead artist or just starting out, having the right tools and supplies is essential to bring your creations to life. In this article, we'll explore the must-have tools and supplies for perler bead designs.
1. Perler Beads
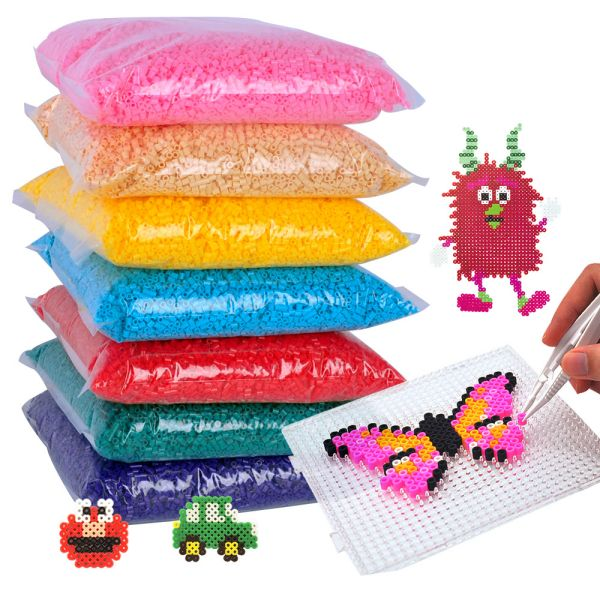
At the heart of every perler bead project are, of course, the beads themselves. Perler beads come in a wide range of colors and finishes, allowing you to create vibrant and unique designs. These small plastic beads are designed to easily melt together when heated, forming a solid structure.
When starting, it's a good idea to invest in a variety of colors to give yourself more options when designing. Additionally, consider purchasing a mix of solid and transparent beads to add depth and dimension to your creations.
2. Perler Bead Pegboards
Perler bead pegboards are essential for creating your designs. These plastic boards have evenly spaced pegs that hold the beads in place as you arrange them. They come in various shapes and sizes, from square to circular, and can even be interlocked to create larger designs.
When selecting a pegboard, consider the size and complexity of your design. Smaller pegboards are great for simple designs or making keychain charms, while larger ones allow for more intricate patterns and larger creations.
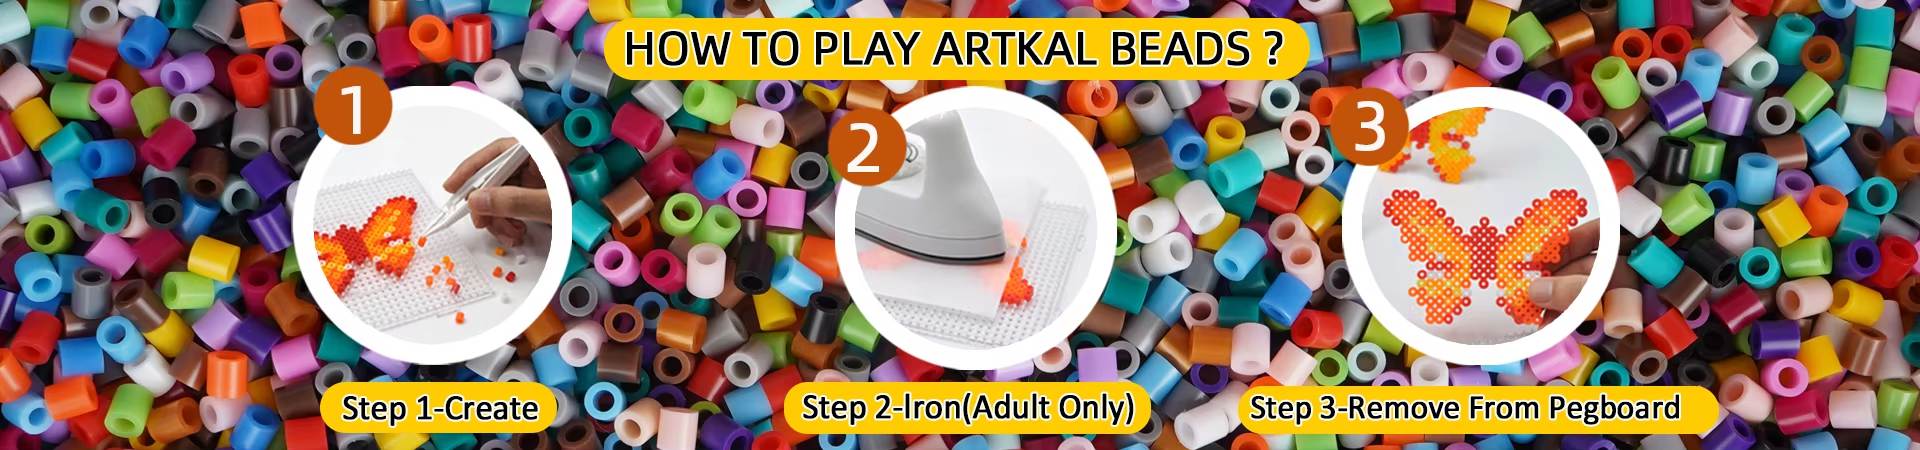
3. Iron or Heat Source
To fuse the perler beads together, you'll need a heat source. Most commonly, an iron is used, but other options such as a heat gun or a specialized perler bead fuser can also be used. When using an iron, set it to a medium heat setting and ensure that it does not have steam function enabled.
Always follow the manufacturer's instructions for your specific tool and remember to never leave the iron unattended when in use. Adult supervision is often recommended, especially for younger crafters.
4. Parchment Paper or Ironing Paper
To protect your iron and perler bead design, it's crucial to place a barrier between them. Parchment paper or ironing paper serves this purpose, preventing the melting beads from sticking to the iron. It also helps to evenly distribute the heat across the design.
Cut the parchment paper to fit the size of your design and place it on top of the beads before ironing. Avoid using wax paper or plastic wrap as they can melt or stick to the design, ruining your hard work.
5. Tweezers or Perler Bead Pen
When working with tiny perler beads, picking them up and placing them precisely can be challenging. Tweezers or a perler bead pen can make this task much easier.
Tweezers provide better control and precision when handling the beads, especially for more intricate designs. On the other hand, a perler bead pen is a handy tool that allows you to easily pick up and place beads in quick succession, speeding up your work.
Summary
Creating perler bead designs is a fun and engaging craft, whether you're a beginner or experienced artist. Having the right tools and supplies is essential to ensure successful and stunning creations. From a wide variety of colorful beads to pegboards, iron, parchment paper, and tweezers, each item plays a crucial role in bringing your perler bead designs to life. Get started on your perler bead journey and let your creativity soar!